Using the Nest thermostat with a modulating Junkers boiler (part 2)

This is the second part of a 2-part blogpost about using the Nest thermostat with a modulating Junkers boiler. In this part I will guide you step by step through the setup and installation process of hooking up a Nest thermostat to my Junkers CerapurComfort boiler.
Disclaimer: If you decide to do an installation yourself, be careful, there are risks involved, you might break your boiler, your Nest, or both, if you don't hook up everything correctly. I take no responsibility, consult a professional if you're not comfortable doing the installation yourself.
OpenTherm protocol
The Nest generation 3 thermostat uses the OpenTherm protocol to talk with modulating boilers. This protocol is used by many boilers, but unfortunately not by Junkers.
The Nest documentation was really helpful, clear and concise. It is where (in Dutch) I discovered OpenTherm adapters, these are little devices that convert the OpenTherm protocol to a protocol supported by the boiler.
To my delight, on the above linked webpage as an example, a Nefit card is shown, and from my earlier discoveries I thought this could be compatible with my Junkers boiler.
Apparently the modulating protocol from Nefit is called EMS, however nowhere in the manuals of my boiler or online I find anything about EMS and Junkers.
I learn from the OpenTherm spec, that a maximum of 42V is used to communicate.
EMS to OpenTherm adapter
Discovering the adapter was a breakthrough, but I still had no idea if it would work with my boiler.
There was 1 webshop selling an EMS to OpenTherm adapter for Junkers in Belgium. No pictures, and not a lot of documentation though. But 1 magical sentence
Enkel voor Junkers ketel met Heatronic 3, Heatronic ‘ en EMS protocol.
(Only for Junkers boiler with Heatronic 3, Heatronic and EMS protocol)
From my manuals I found that my boiler used the Heatronic 3 system inside, but nothing about EMS.
I googled the product number mentioned on the webshop's product page, and to my delight I find the exact same adapter from Nefit, with the same product number.
At this point i'm getting more convinced that this will work. I decide to open up my boiler, and see what's inside. Perhaps I find a connector resembling the one on the adapter, then I would be convinced.
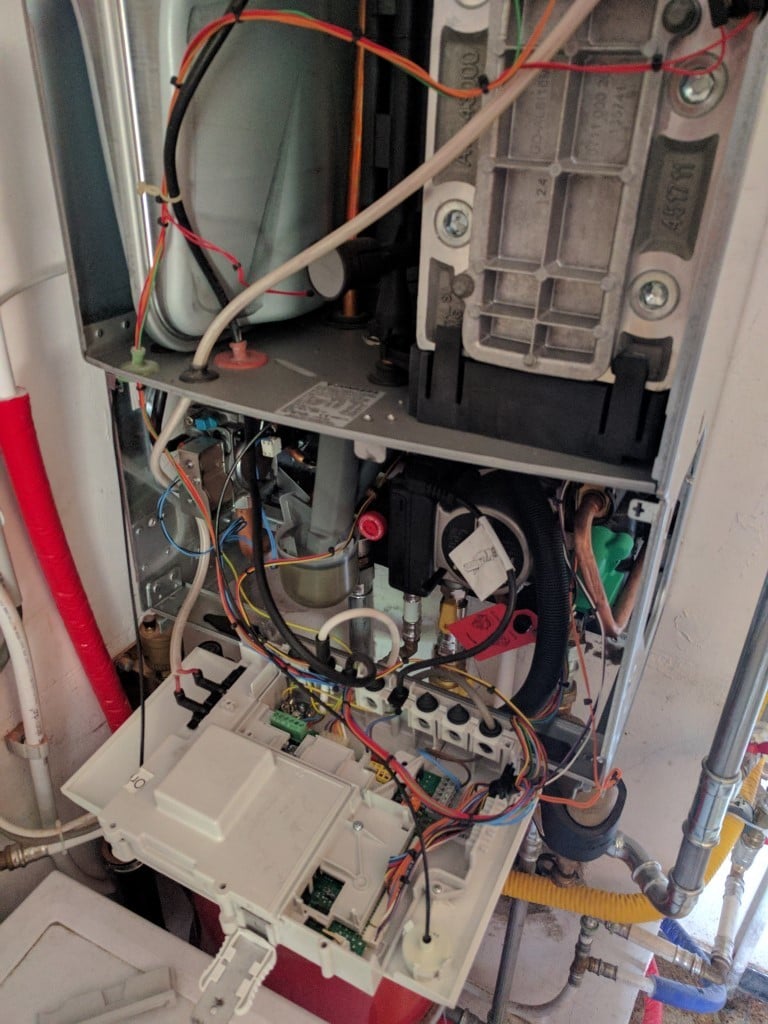
Opening the boiler
Let's open up the boiler, on the bottom there are 2 screws near the front of the panel, unscrew them, and on the top there is a locking mechanism which you can lift to unlock the entire cover.
On the bottom, the panel with the buttons, that is your Heatronic 3 system. You will need to get to the back. Above the Heatronic there is a sliding lock, slide it down, and you will be able to rotate the heatronic towards you to reveal the back.
On the back there are 3 screws you need to unscrew to reveal the connectors inside. 2 screws are directly adjacent to the cable holders. and one is on the bottom right.
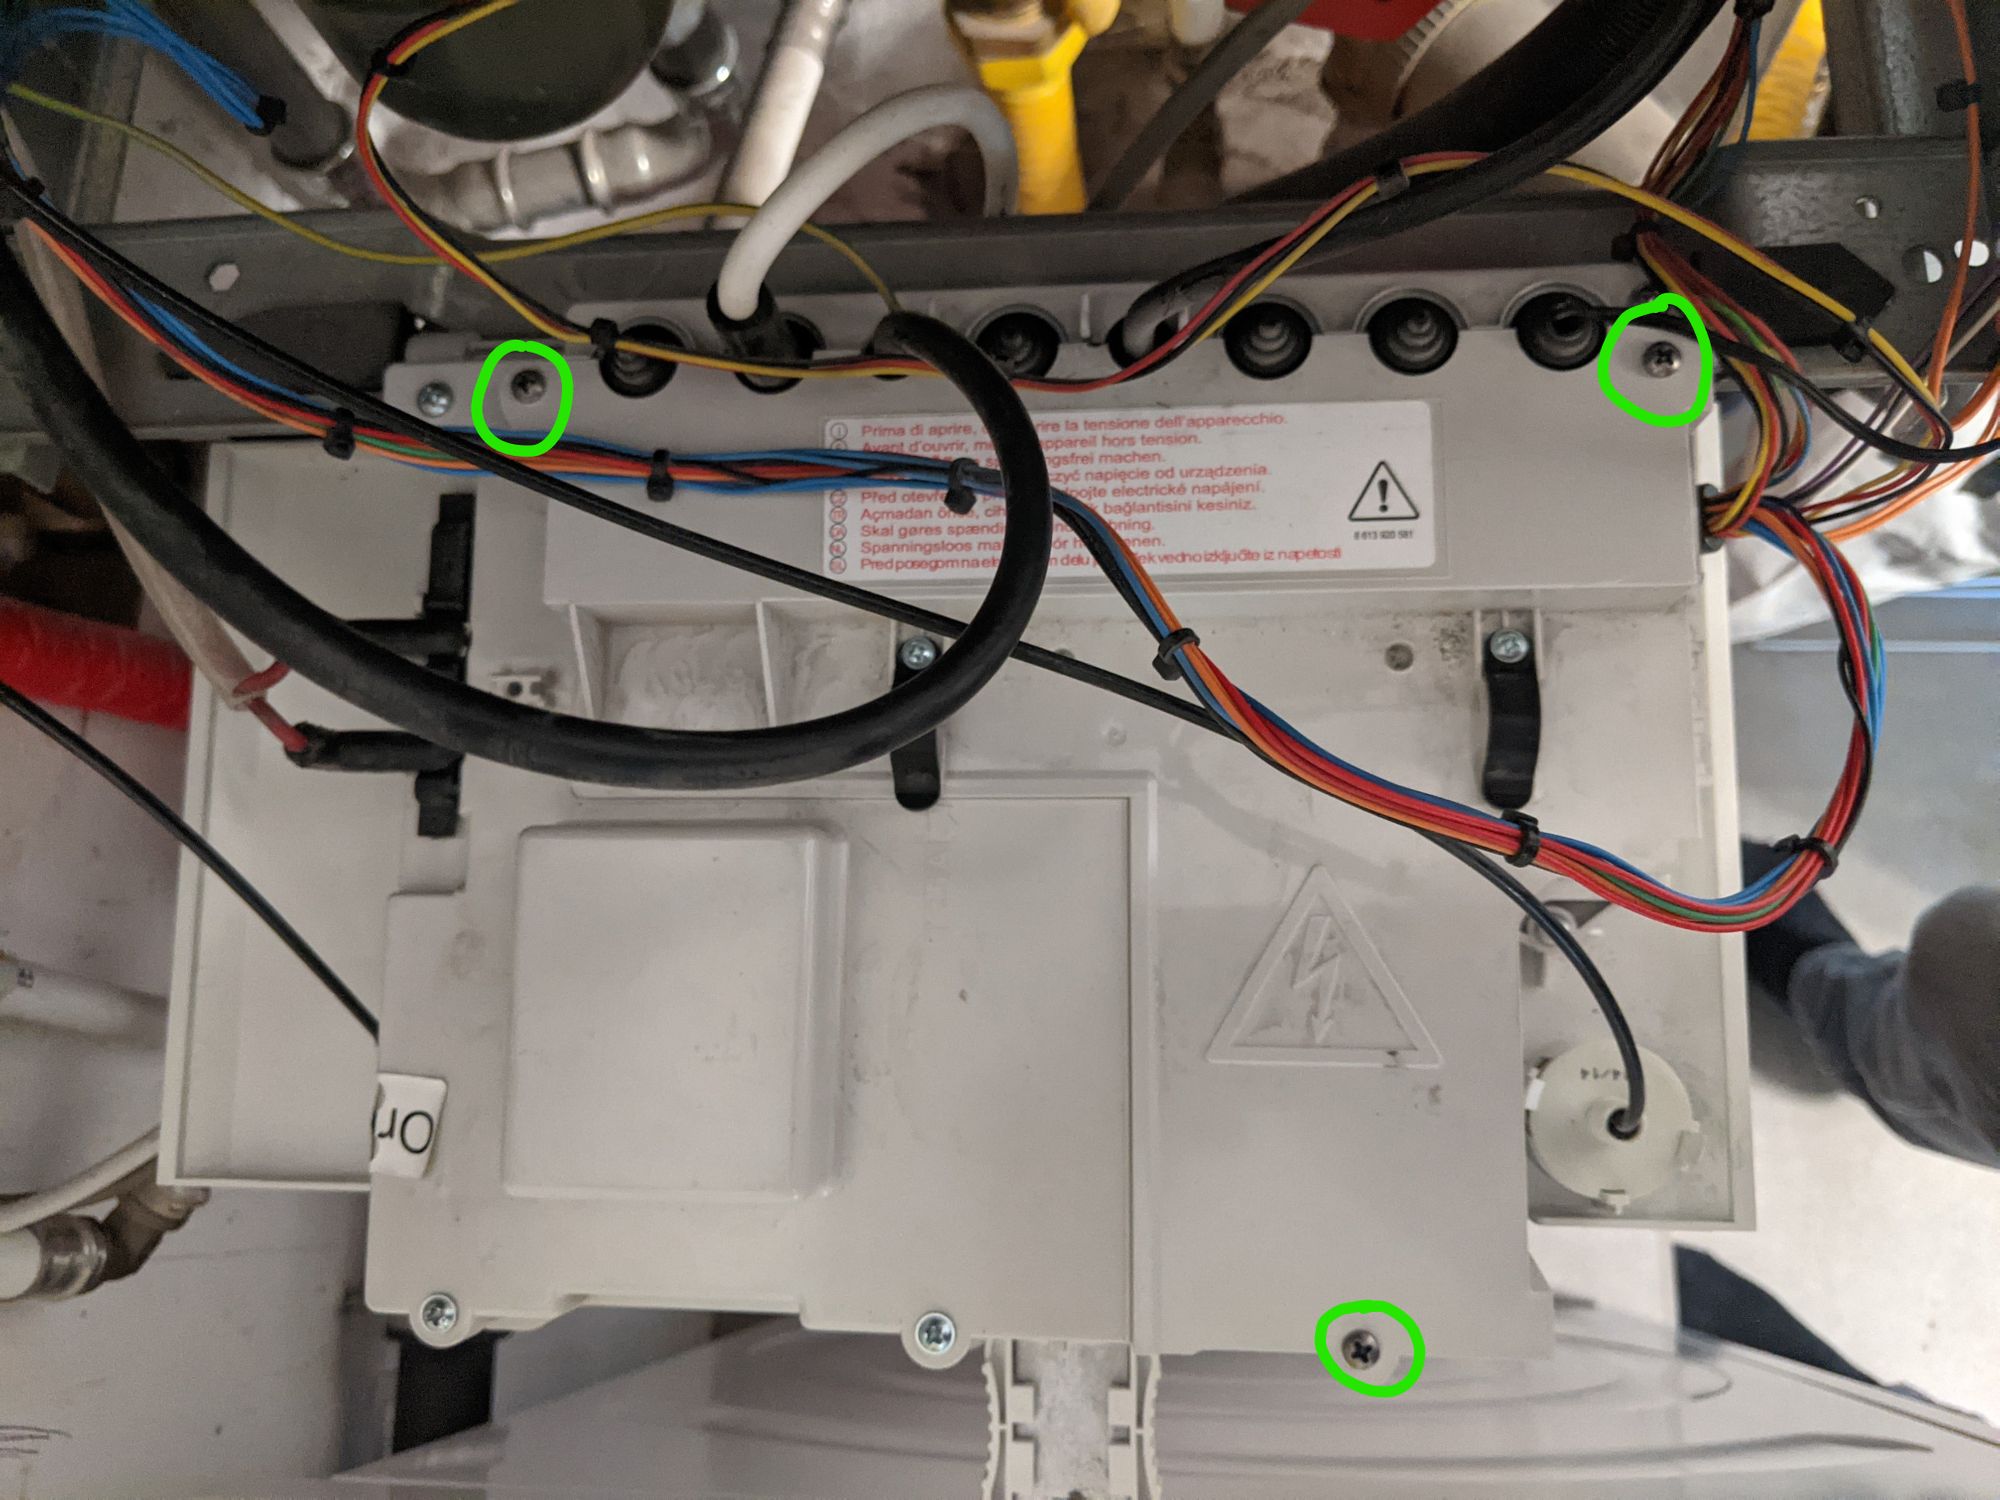
Once you unscrew these, you can lift the panel up, be careful, it slides directly up, dont try to pull 1 side, lift it all together.
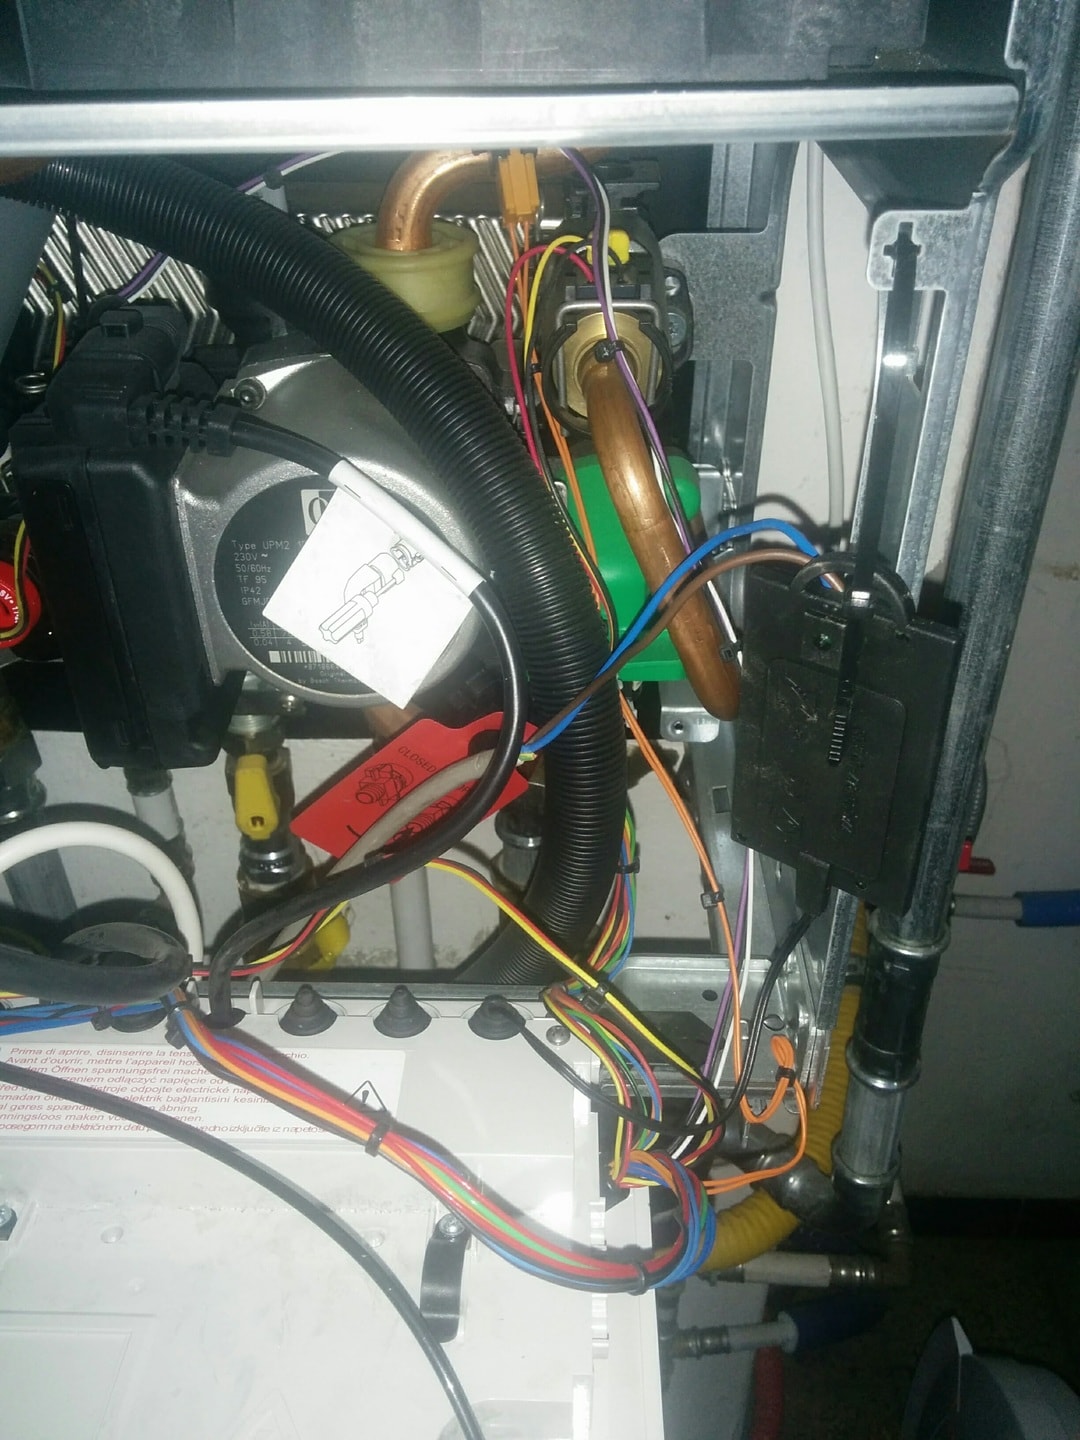
Then you should see something like this:
Unfortunately, no luck here, no connectors resembling the one on the adapter. But lets not give up.
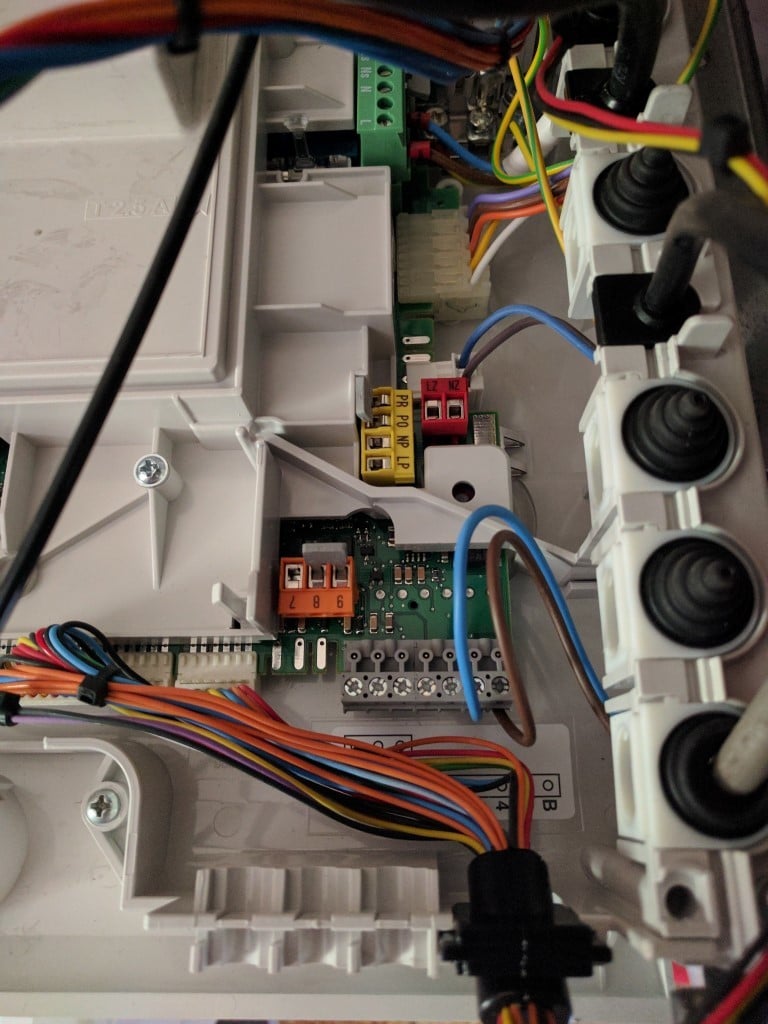
I decide to measure the voltage outputs on the connections where the thermostat should be connected (which I found in my manual)
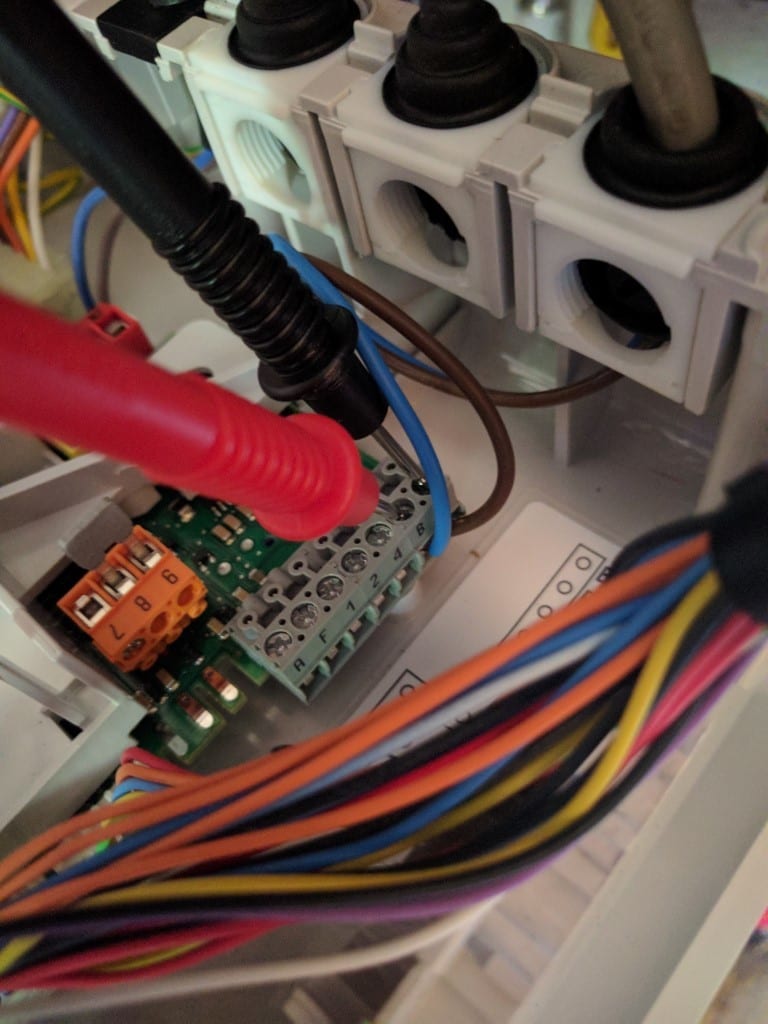
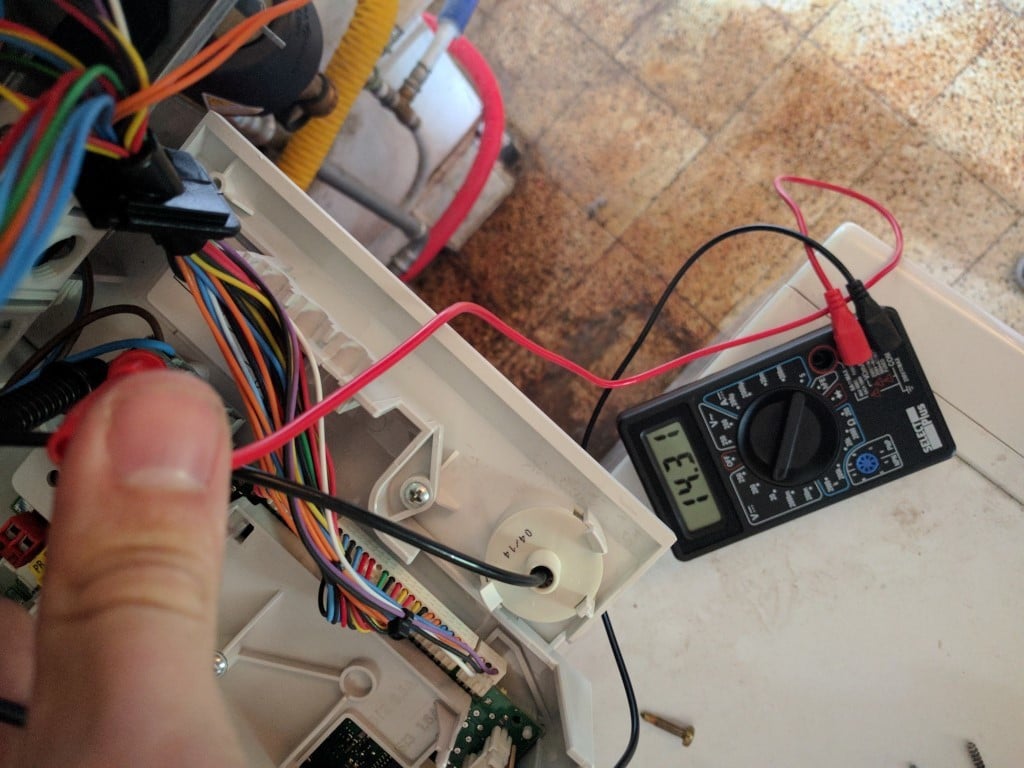
This matches the voltage i'm getting at the thermostat. So the thermostat is most likely connected here.

At this point i'm fairly convinced I won't break anything by connecting a Nest. I'm still not sure it will work, but at least I can try.
Lets try connecting the nest
Time for some Famous Last Words:
Fuck it, what's the worst that could happen?
I order a Nest, and the adapter (I decided to order the Nefit adapter, as compared to the Belgian counterpart it's almost half the price and I'm fairly convinced it's the same anyway)
With the Nest came this schema:
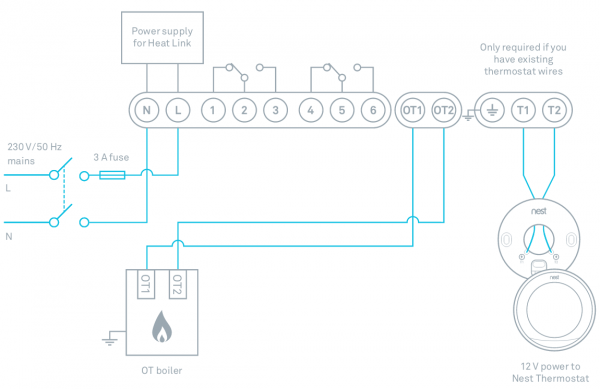
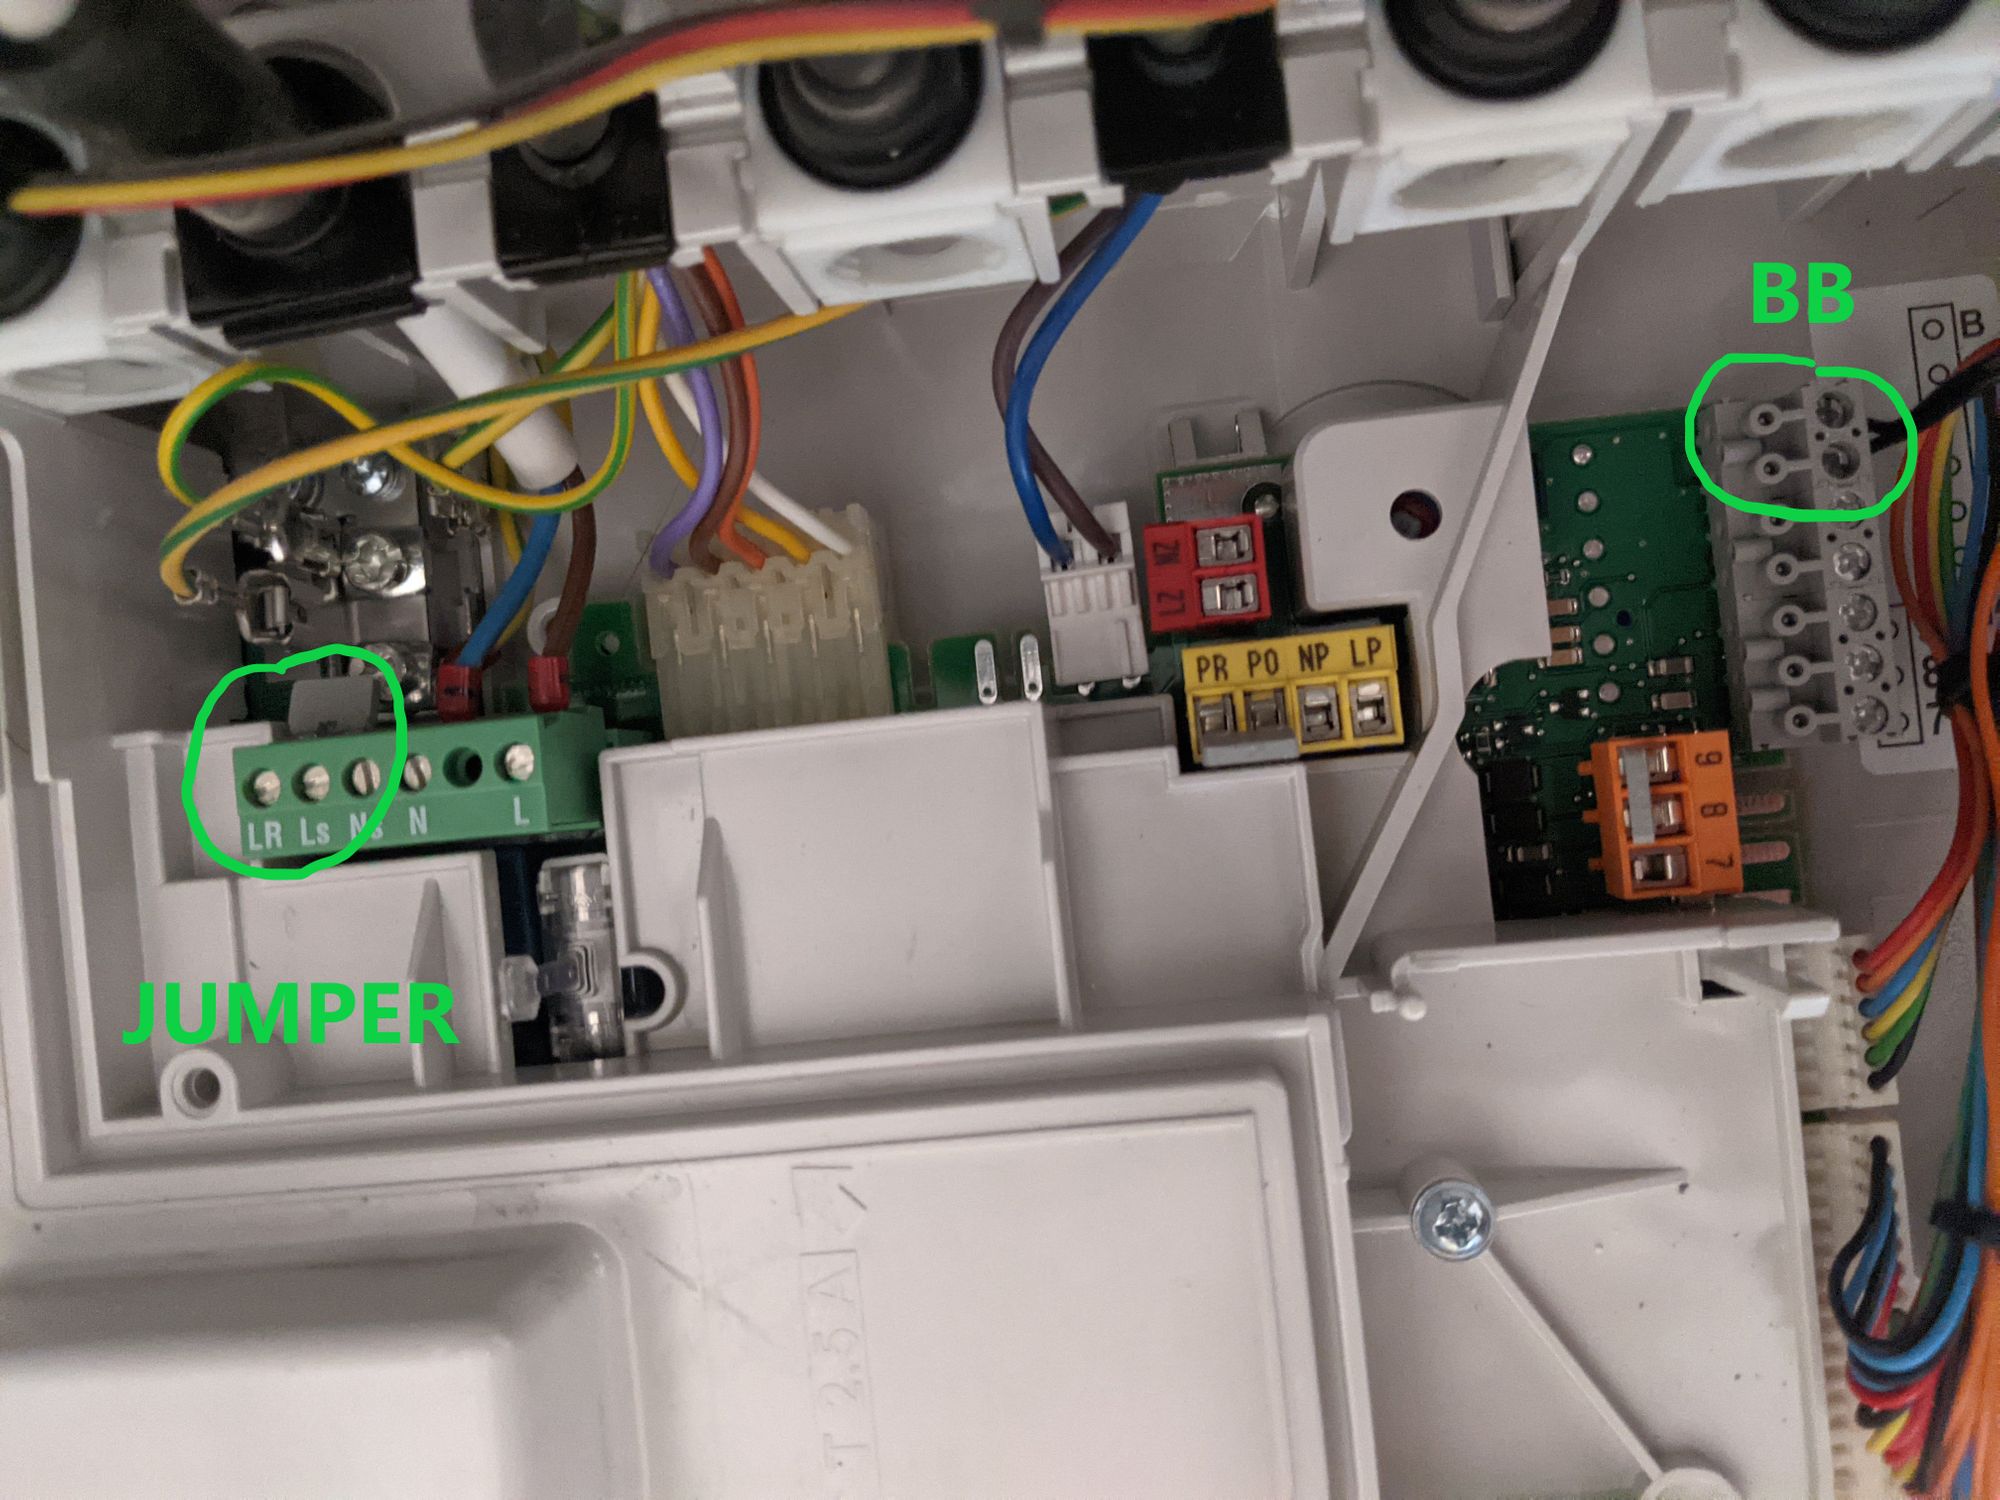
I unplug the thermostats wiring from the Heatronic, connect the black cable of the Adapter on the same ports I just unplugged the original thermostat from (the BB ports), and connect the Nest Heatlink on the OT1 and OT2 port to the green ports on the adapter.
Edit 2021-04-05:
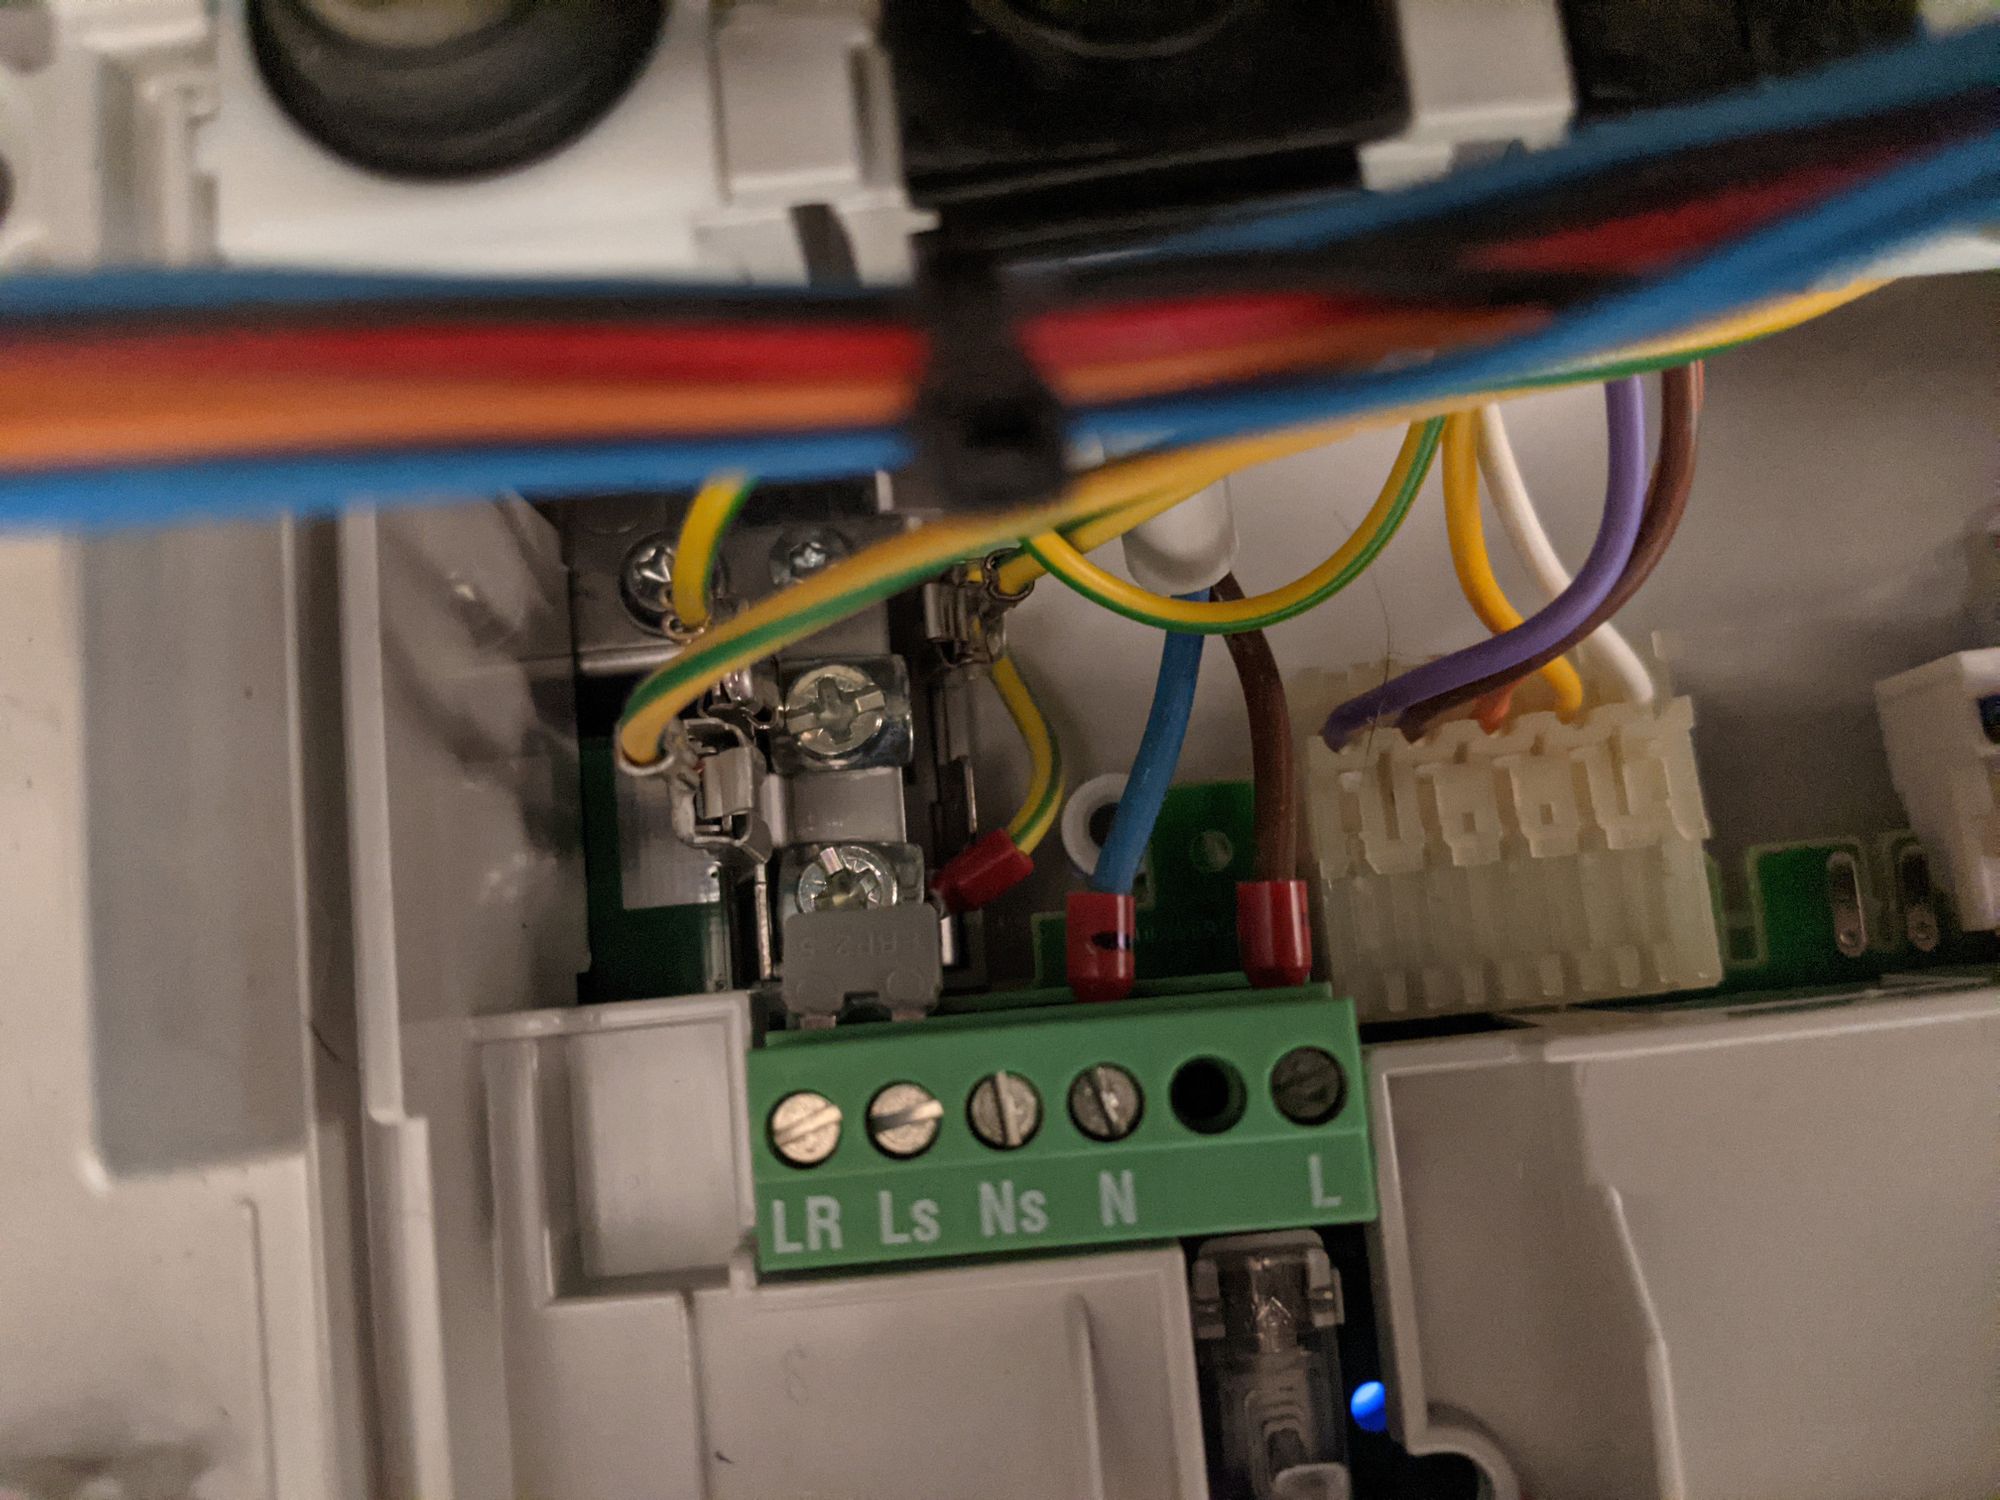
I received a question about other ports by someone who found this blogpost over at Tweakers.net, where he asked what was connected on the Lr and Ls ports, as his old thermostat was connected there. On my end, my old thermostat was also connected to the BB ports, so I was interested what was going on with my Lr and Ls ports, I decided to open up the boiler again, and found that a jumper was present that connected Lr with Ls.
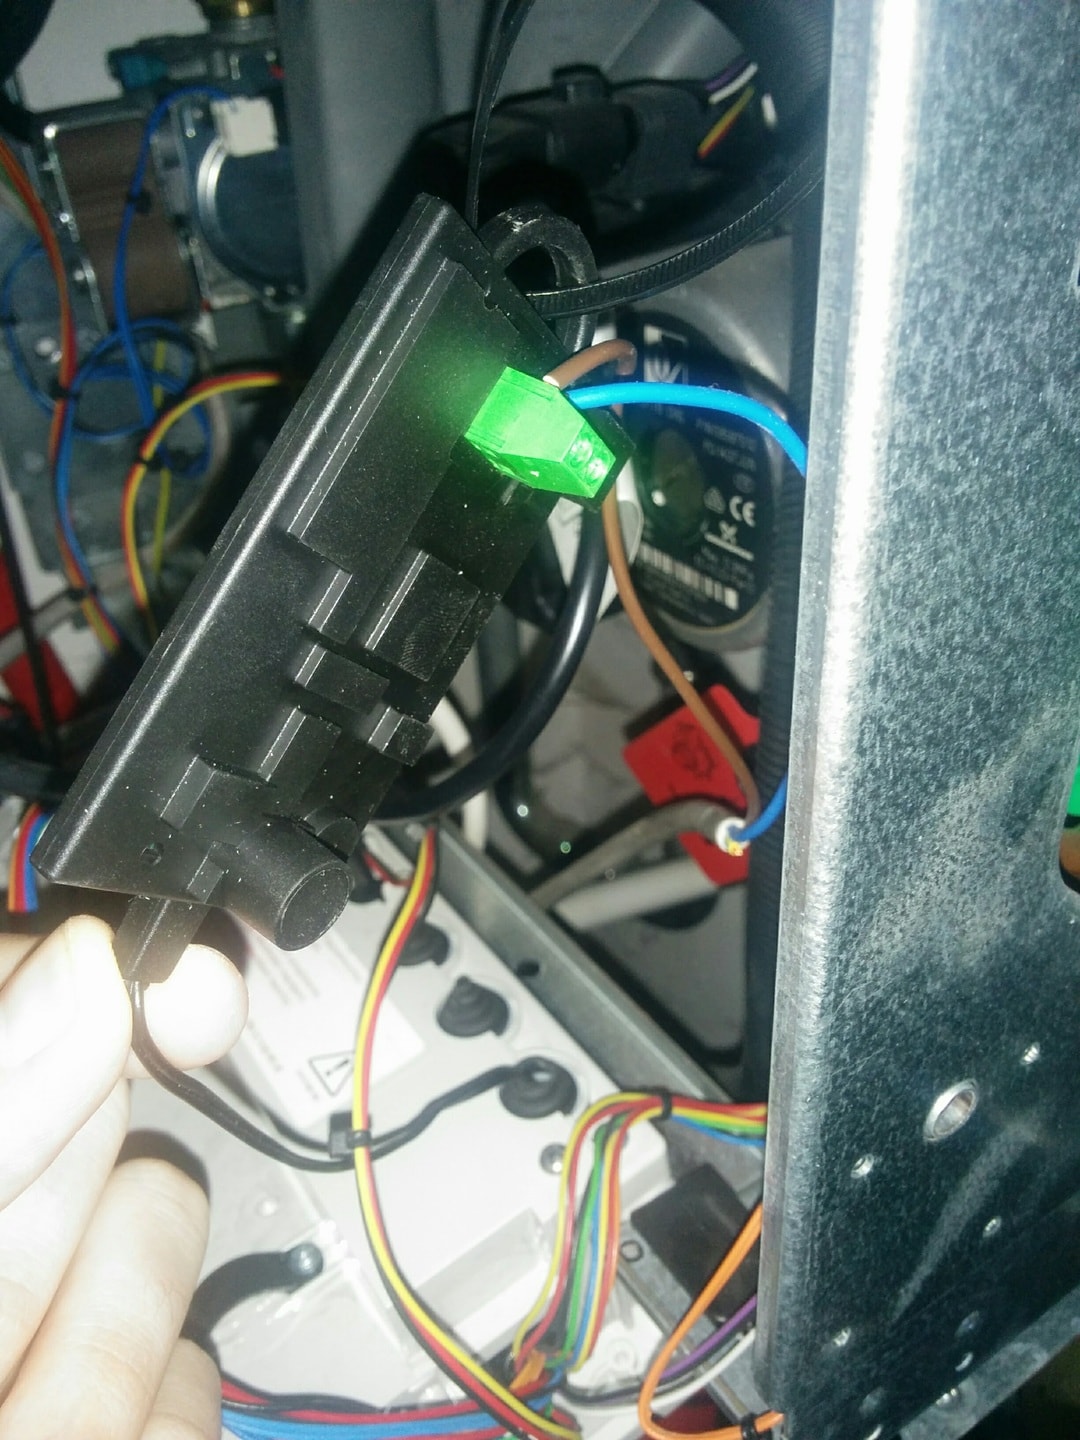
There is no real slot to put the adapter, but it comes with a little strap, I use it to hang it on the inside of the boiler in the same hole where on the other side there is a cord that holds the Heatronic in place.
I connect power to the N and the L on the Heat Link.
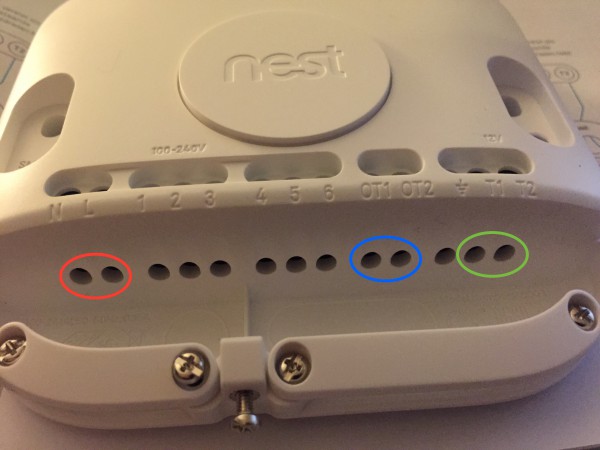
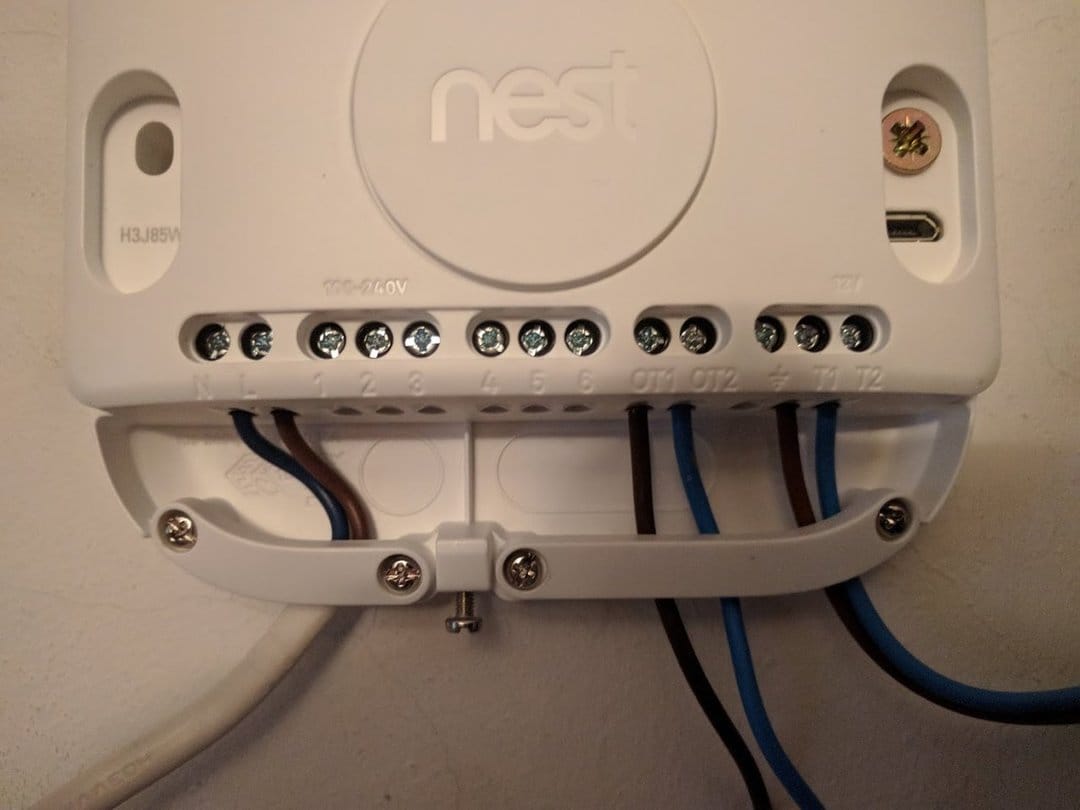
Lastly I used the existing wiring to connect the Nest Thermostat to the Heat Link, by connecting ports T1 and T2 on the Heat Link, with the T1 and T2 on the thermostat
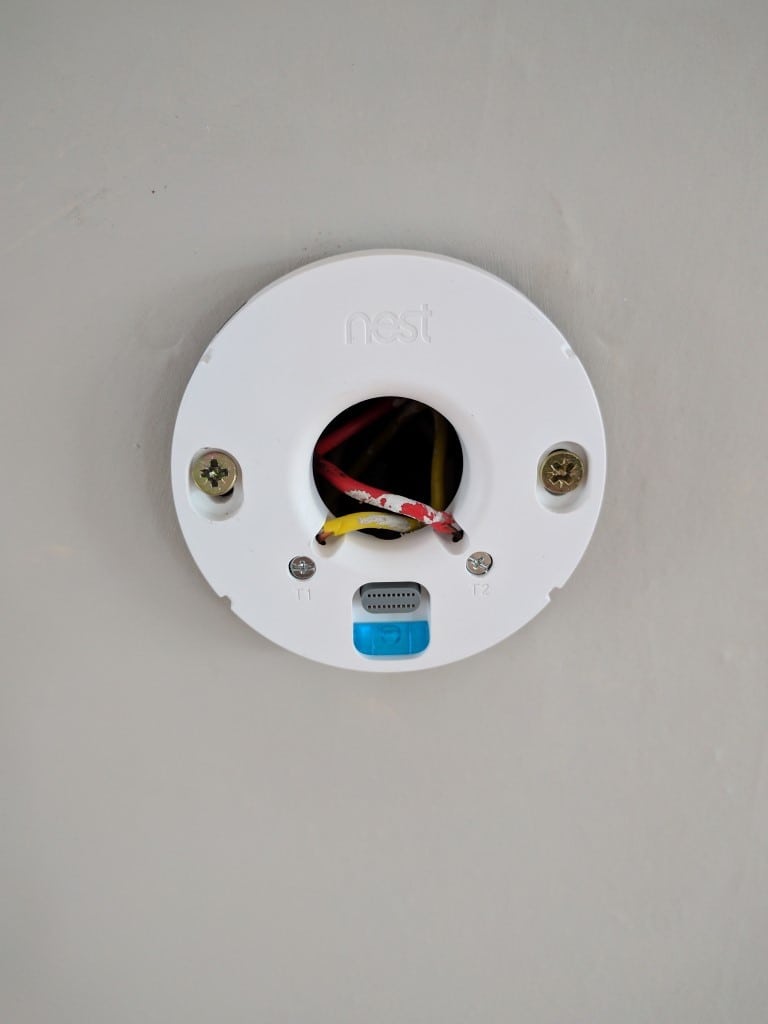
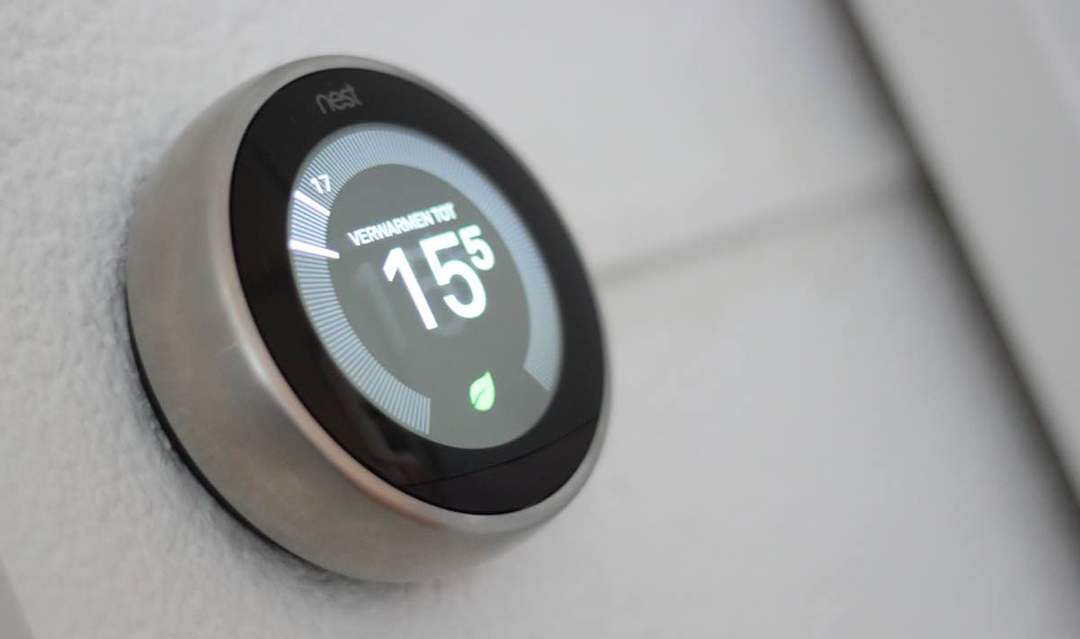
I attach the thermostat, and what do you know? It works, all my suspicions turned out to be true. After going through the initial set-up (Tip voorlooptemperatuur = 55°), this is how it looks:

Conclusion
I hope someone will find this helpful, and can enjoy the wonderful Nest thermostat, the awesome app, extensive integrations and beautiful design!
In a completely unrelated note: I'm selling a Junkers FR-120 and MB-Lan Module 2 if someone is interested
If you want to say thanks, buy me a beer: